I made another computer case.

Our home server/HTPC broke down after close to 6 years, and it was time to replace it. Being me, I didn’t want to just buy an off-the shelf machine – where’s the charm in that?
This one is a little different than my previous builds. I didn’t modify an existing enclosures this time, but instead created one completely from scratch. 3D modeled and 3D printed based on nothing more than my own ideas and my own measurements.
I do like reusing and repurposing existing things, and I try to not get stuck in a throw-away mentality. This new case is however entirely made from renewable or recycled materials. The main body is printed using biodegradable PLA plastic (made from corn starch or cane sugar). The only other parts of the case consist of a power switch and an LED, both taken from the failing computer it was meant to replace.
I had an idea of a completely smooth case without any visible corners, with a single air inlet on the top connected to the CPU fan. A number of smaller air outlets near the bottom would force the airflow to spread out around the motherboard and the rest of the components. The shape would initially resemble a simplified cloud, but that quickly changed.
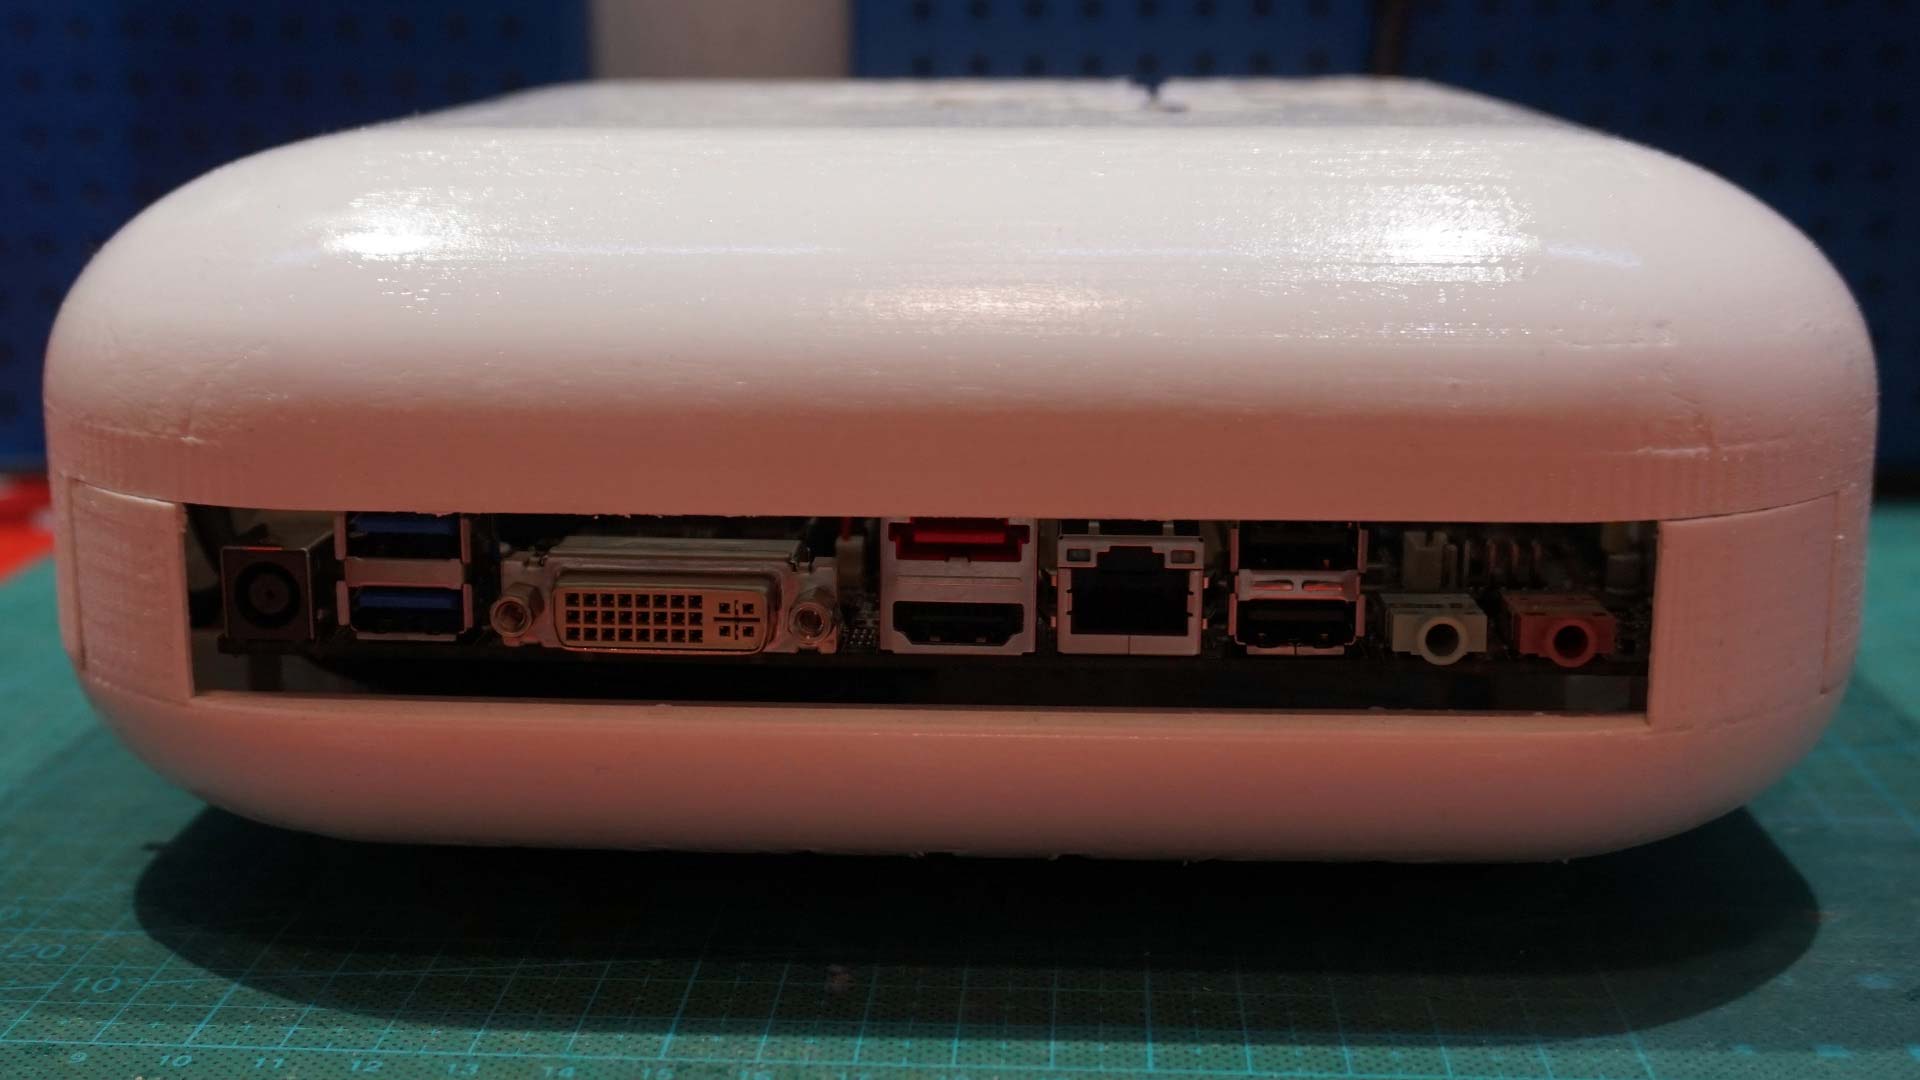
I was impressed with the layout, performance and tweakability of the Asus H81T Mini-ITX motherboard that I used for the 1-Up NES case mod, and decided to use another one for the new case. Most important was the fact that the H81 has a rear power jack that fits standard laptop power bricks, and I could pick up a used one from Dell on eBay that worked right away, no modifications needed.
I used a modeling tool that I already knew; Tinkercad – a free, browser-based online CAD tool from AutoDesk. It has limited functionality and performance, and I’m planning on learning a “real” CAD program soon (Fusion 360?), but I was eager to get started right away. After a number of versions and revisions, I had a rough printed version (5) up and running 24/7 for about a month. After a lot of checks, changes and tweaks, I finally printed the final version (8) on my heavily modified RigidBot 3D printer. By now the initial project name Fluffy had changed to Frosty, and the design would now look more like snow than a cloud. I made a snowflake design for the air inlet, which also serves as a fan guard.
After sanding I applied a few layers of acrylic clear coating to get more of a snow crust look. PLA is notoriously hard to sand as it melts and clumps up if you go too fast due to the friction. I only went up to 240 grit, which is why the surface isn’t perfect. If this was a job for someone else I would go to at least 800 grit, but as it will only be used at home this is good enough.


When assembling the computer, pretty much everything fit perfectly. I only had to drill the hole for the LED a tiny bin larger and use a scalpel to shave off about 0.2mm for the power switch.
Unless you have your ear right next to the computer, you can’t hear it running. Since I use an SSD, the only moving part in the computer is the CPU fan, and Intel did a fantastic job with making it whisper quiet – at least when enabling the Q-Fan control in the UEFI bios.
With the CPU on full load on all cores at 3.2Ghz, the computer is still almost dead silent and the CPU temperature is usually around 30°C.
All in all, I’m happy with the results. I’ve learned a lot and had fun doing so.
If you want to print your own, I’ve made the .stl files freely available at http://www.thingiverse.com/thing:1241259